How to Fix a Stuck Garage Door
Owning a garage is so convenient, as long as the garage door is running smoothly. You rely on your garage door to go up and down on demand multiple times each day. If your garage door was installed properly, you’re used to it working without any issues. But, perhaps today, it got stuck.
Garage doors rely on a series of interconnected parts to function properly. Their complex design can sometimes malfunction without warning. Regular garage door maintenance can help avoid these issues, but breakdowns can still happen.
A stuck garage door can cause inconveniences in your daily routine. Sometimes there is a simple fix, and other times you may need professional repairs. These tips can help you avoid frustration and identify the root of the problem so you can get your garage back to normal right away.
Causes of Sticking
The first step toward fixing your garage door is to figure out why it got stuck. Garage doors are powered by many different parts, which can malfunction for a variety of reasons.
Here is a list of common problems that cause garage doors to get stuck:
1. Dead Batteries
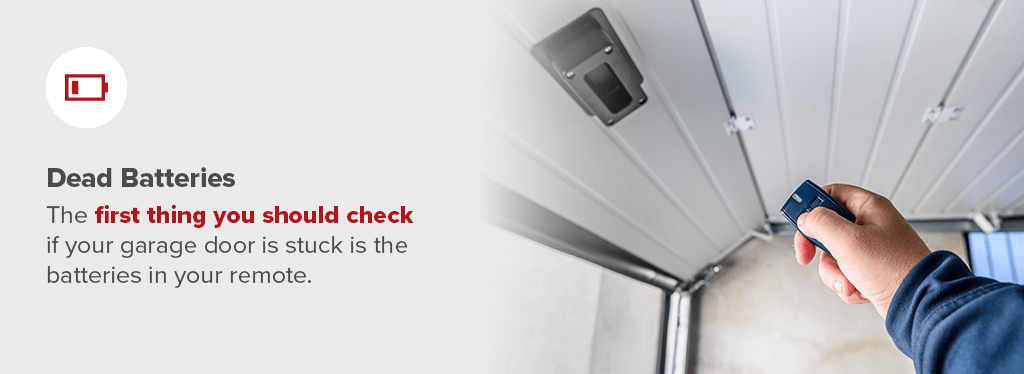
The first thing you should check if your garage door is stuck is the batteries in your remote. Batteries die all the time, and this is often the problem. If you swap in fresh batteries and it doesn’t help, you can start checking out other likely causes.
2. Locked by Accident
This may seem obvious, but have you checked the lock? Garage doors can often become locked by mistake by a child or an automatic locking system. If your garage door won’t open, take a second to check the locks before trying other solutions.
3. Cold Weather
Oregon winters are cold and wet, and water can collect and freeze around the springs of your garage door. A buildup of ice can put pressure on your springs, making your garage door latch stuck. Try removing the ice from the springs and see if your door becomes unstuck. Clearing the ice from your springs may be a simple fix unless they have become damaged. Use a heat gun on a low setting or a hair dryer to gently melt the ice away.
If the ice has broken the springs on your garage door, call a repair service right away. Replacing a spring yourself is extremely dangerous and is not recommended.
4. Broken Pulley or Springs
A pulley and spring system lifts your garage door up and down. These mechanisms pull the door along the track to open and close it. If a spring is broken or the pulley is obstructed, the garage door will not be functional. These parts can break even while the door is in motion, causing it to be stuck halfway or fully open.
Springs are not designed to last forever. After a while, they need to be replaced. If you believe this is causing your door to be stuck, call a professional garage door repair service. They can fix the broken spring or pulley system to get your garage door running smoothly.
5. Track Issues
Your garage door’s track is an essential part of the opening and closing mechanism. But it’s also one of the most delicate. Rollers guide your garage door along the track to lift it up and down. If the track is disturbed, your door can easily become stuck.
Common track issues include:
- Blockages: Objects like rocks and leaves or even a rubber ball have been known to weasel their way into garage door tracks. Examine your tracks for any items that could be blocking the rollers from moving. Only try to clean these blockages if your garage door is in the down position to avoid the risk of injury.
- Dislodged rollers: If your garage door opens halfway and stops, your rollers may have jumped off of the track. A professional is needed to fix this problem safely.
- Damage: Regular wear and tear can add up, causing the tracks to become bent and misshapen. They can also be broken by an impact from a car or harsh weather conditions. Call a professional to make sure your garage door is fixed properly.
6. Sensor Malfunction
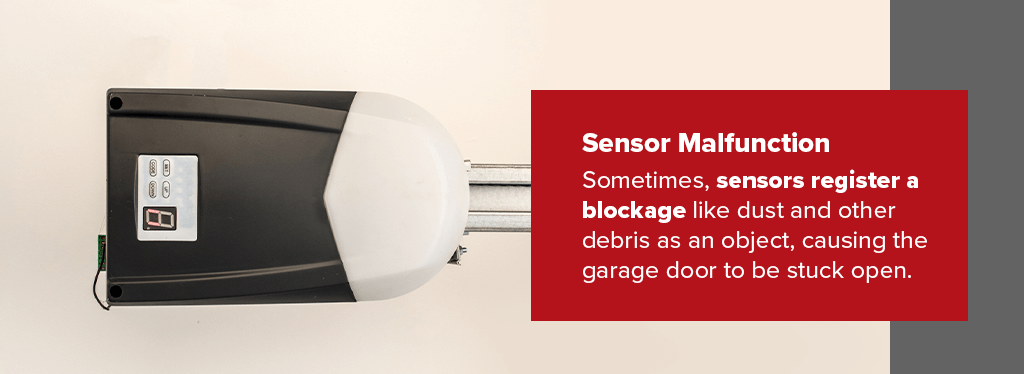
Sensors are designed to keep your garage door open if they sense an obstruction. Sometimes, sensors register a blockage like dust and other debris as an object, causing the garage door to be stuck open. Try wiping them off and test if that works. If problems persist, consult a professional for help.
7. Inadequate Lubrication
Proper lubrication is required for your door to function smoothly. If your garage door has been making a lot of noise lately, you may not have enough. Poor lubrication will cause your door to get stuck, but the solution is simple. Apply lubricant to the tracks, hinges, rollers and springs after cleaning the components. Do this when the door is in the down position.
Stuck up, Down or Halfway?
The spot where your garage door is sticking can help you troubleshoot the cause of the problem. You can rule out certain malfunctions depending on where it is jammed.
Stuck Up
Common causes for a garage door that is stuck in the up position include:
- You have malfunctioning garage sensors.
- There’s a broken spring.
- There’s an electrical issue with the garage door opener.
- Remote batteries need to be replaced.
Stuck Down
Common causes for a garage door that is stuck down include:
- There are broken parts, like hinges, cables or rollers.
- The garage door is locked.
- Rollers are out of the tracks.
- Remote batteries need to be replaced.
Stuck Halfway
Common causes for a garage door that is stuck halfway include:
- An obstruction is blocking the rollers on the tracks.
- There’s a jam in the spring and pulley system.
- The pressure on the garage door opener needs an adjustment.
Contact Oregon City Garage Door to Fix a Jammed Garage Door
If your garage door is stuck, you can look at the areas listed above to identify the problem. Check the locks, clean out the tracks, apply lubricant and attempt a few other easy fixes. However, making major repairs to your garage door can be dangerous if you do not have experience. Trust your garage door to the professionals for a quick and easy fix.
At Oregon City Garage Door, our professionals provide high-quality prompt and friendly service. Our experts are available to inspect your residential or commercial garage door and find the right solution to make your garage fully functional again. We also offer garage door maintenance and tune-up services to prevent your garage door from getting stuck again in the future.
If your garage door is having issues that you can’t seem to fix, call in the experts. Schedule a service with Oregon City Garage Door today!
How Long Do Garage Door Rollers Last?
“How Long Do Garage Door Rollers Last?”
The answer depends on what type of garage door rollers you have in your garage. When you provide proper maintenance for your rollers, they can last anywhere from one to two decades. Other factors play into the longevity of rollers too, such as the climate and how often the garage door is used.
Garage Door Rollers: Plastic vs. Nylon vs. Steel
Garage door rollers are usually made from plastic, nylon or steel.
- Steel is the most durable material for rollers, but it’s the most expensive as well as the noisiest of the three.
- Nylon is much quieter and less expensive, but it’s also less durable.
- Plastic is the least costly and least sturdy of the three. Plastic rollers do not have ball bearings, which means they can be noisy, and they generally require replacement after just a few years.
Do Garage Door Rollers Wear Out?
Eventually, your garage door rollers will stop working effectively. Factors that cause them to wear out include:
- Weather: Metal parts rust when they’re exposed to lots of rain. Stainless steel holds up much better, resisting rust and working exceptionally well for car washes as a result.
- Usage: If you use your garage door multiple times every day, you may cut down on the rollers’ long-term life. These rollers work for so many cycles, and once you hit that number, you’ll need to replace them whether it’s been two years or 12.
- Track maintenance: With any machinery, the better maintained it is, the more efficiently it will function. Getting regular inspections of your rollers each year will ensure that they are working properly, catching small problems before they grow into big ones.
- Track cleaning: Removing small debris from the tracks will improve the ability of the rollers to move while reducing noise. You can add a lubricant to the tracks if the sound is especially loud. Try specialty garage door formulas that you can get from your local garage door repair shop.
How Often Should You Replace Garage Door Rollers?
You should replace your rollers when they stop working well. Depending on the material, that may mean 10 to 20 years, though plastic rollers will need to be replaced well before that.
To determine whether you need new rollers, disconnect the door from your automatic opener. Pull the cord manually to make the garage door open and close so that you can see how much drag there is and whether it seems like too much. If it is, you may need to replace the rollers.
If you decide you need new rollers, you should contact a professional and have them complete the installation. Someone who doesn’t understand garage door rollers may install them improperly and put your family at risk.
Rollers that don’t meet the correct installation standards may break or wear out quickly, and the door may become unbalanced, closing suddenly and potentially hurting someone.
Do You Need Assistance Replacing Your Garage Door Rollers?
Contact Oregon City Garage Door to discuss our parts and repair services. You can request service online or give us a call at 503-632-3070.
Should I Replace Both Garage Door Springs?
“Should I Replace Both Garage Door Springs?”
Yes. You may be tempted to save money on parts and labor by replacing just one spring, but you’ll likely need to replace both when one spring breaks.
Garage doors have two springs, one on either side of the door. The springs exert the force that makes the door light enough to be lifted. When one garage door spring breaks, many homeowners wonder if they need to replace both springs or if they can replace only the one that malfunctioned. Read below to learn why you should always replace both garage door springs when one breaks.
Why Is a Balanced Garage Door Important?
Springs keep your garage door balanced, ensuring that both sides of the door rise up and down at the same time. If one spring breaks, it throws off the function of the door. The two sides will rise and fall at different speeds.
You’ll hear more noise when you use the garage door, and the other spring will wear down faster with the higher workload, trying to balance out the issues on the other side of the door.
The average life expectancy of a garage door spring is about 10,000 open and close cycles. For most garages, that means about seven to nine years, but some springs break within four or five years with frequent use.
How can you tell if your garage door is unbalanced? In addition to hearing more noise, you can look for several telltale signs. A slanted or crooked door is a sign of imbalance, and so is a garage door that slams down when you close it instead of coming down slowly. If you notice increasing gaps between the coils in your springs, consider it an indication that the springs are failing and may need replacements.
What Is the Danger of an Unbalanced Garage Door?
If one spring breaks, there are several things that can occur:
- The door may close suddenly.
- Loose springs can crack or fall out of the brackets.
- The door may speed up or slow down, becoming unpredictable and putting you and your family in danger when you try to enter or exit the garage.
Having a malfunctioning spring can lead to warping on the tracks due to wear on the wheels. The motor can also experience greater demand for its power when the garage door is being pushed up, which means it will need to be replaced sooner.
An imbalanced garage door can also cause injury or damage to your property. If your garage door falls on your car, you may need to take it to the shop for repairs. It could fall on something sitting near your garage door entrance, too, such as a bike or scooter.
Learn About Our Garage Door Spring Repair
Should I Replace Both Garage Door Springs?
If you’re thinking of replacing one garage door spring, you’re probably better off replacing both. Your garage door will function better when you get two new springs to balance out the wear and tear, and you’ll gain peace of mind protecting your family from the consequences of a broken spring.
Can a Garage Door Operate With One Spring?
No. Both springs must work together to pull the garage door up and bring it down gently. When operation relies on one spring, in addition to presenting safety concerns, it can also lead to wear and tear on the door.
You shouldn’t try to balance a garage door yourself. While replacing both springs is critical for your door to function again, only a professional can provide the repairs you need. Garage door repair technicians understand how to perform tests on the door’s balance.
Garage doors are heavy, often weighing hundreds of pounds, and you don’t want to put yourself in harm’s way. The safest option is to get help with the replacement of both springs.
Why Do Garage Door Springs Break?
The most frequent reason a garage door spring breaks is wear and tear. Nothing lasts forever, and when your garage door goes up and down at least twice a day, that puts a lot of tension on the spring. You can buy extended life span torsion springs to get more use out of your garage springs, but you’ll still need to replace them at some point.
Another contributor to broken garage door springs is rust. It shortens the life span of a spring and leads to more friction when the coils move. You can apply a silicone-based lubricant to your springs every season to reduce rusting.
Poor maintenance may also cause springs to break. You should check the garage door balance every year so you can detect any potential issues early. Use the emergency release cord to put the door in manual mode, and then lift the door and let go. Well-maintained springs will keep the door in place.
What Type of Garage Spring Do I Need?
To replace the spring correctly, you’ll need to know what type you have. The two main types of springs are extension and torsion.
Torsion springs are the long, thin springs along the door’s horizontal track, which extend when you move the door. They include three types of springs:
- Open-looped extension springs
- Double-looped extension springs
- Clipped-end extension springs
Torsion springs sit on the metal shaft above the door opening. They get wound to a specific torsion that assists with the assembly. The four types are:
- Early-set torsion springs.
- Standard torsion springs.
- Torque-master torsion springs.
- Steel rolling door torsion springs.
Is It Dangerous to Replace a Garage Door Spring?
Yes, it can be dangerous for a homeowner to replace a broken garage door spring. Garage doors are heavy, and their components are under a lot of pressure. It’s best to leave the job to a professional. The dangers of attempting repairs or replacement on your own may include:
- Springs snapping back on you as you try to replace them: The tension in the springs can produce quite a sting or even cause serious injury.
- The door falling on you as you work: A broken spring can make a garage door close suddenly, injuring you or damaging any items in the door’s path.
- Estimating the wrong tension for the springs: If you guess wrong, then the garage door could fall when you’re using it later.
What Do I Need to Replace a Snapped Garage Door Spring?
To replace an extension spring, you will need the replacement part as well as C-clamps. Open the garage door, then secure it with the C-clamps. Take the spring off the track bracket and pulley, and remove one end of the safety cable. Put the new spring on along with the pulley and connect the safety cable again.
Torsion springs are more challenging to work with. Close the door and unwind both the springs. Take them off the central rod bracket and take the cables off the pulleys. Slide the loosened pulleys off the rod. Put on the new springs, then reinstall the pulleys and cables. Wind up both springs using a winding bar and test the door balance.
Contact Oregon City Garage Door for Spring Repairs and Replacements
Now you understand why a balanced garage door is essential. It protects you and your family. Performing repairs on your springs or replacing them yourself may cause safety issues, and the work can be challenging if you’re not familiar with all the moving parts. It’s best to leave repairs and replacements to the professionals, especially if you live in Tualatin, Wilsonville, Tigard, Portland, Happy Valley, Canby or any other areas in Portland for which we regularly provide expert garage door services.
If you need assistance replacing your garage door springs, give Oregon City Garage Door a call at 503-632-3070 or contact us online to schedule service. We can get the job done quickly and correctly the first time around.

